 You are going to have so much fun! It helps to have a friend nearby to hold things in place, twist the wires, or squirt the glue.
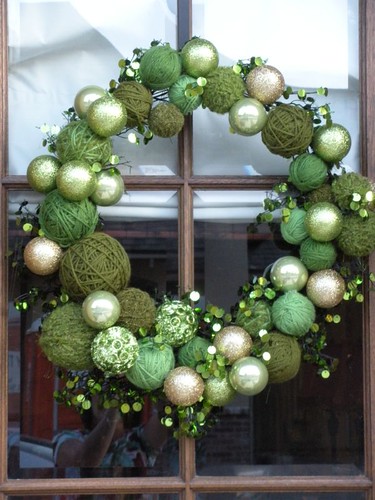
 Supplies used for this wreath:

1 wire wreath
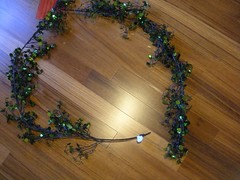
1 decorative garland - here is an example from Michaels. Just make sure it can be twisted to cover the entire wire wreath and has branches that can be twisted and bent to fill empty spots
Styrofoam balls:
2 Large
6 Medium
8 Small
6-8 Extra Small
Ornaments:
2 specialty - we used green fuzzy with gold circles
6 plain green
5 gold glitter
8 green glitter
Glue gun
Glue for glue gun
Craft glue
Pins
Floral wire
wire cutters
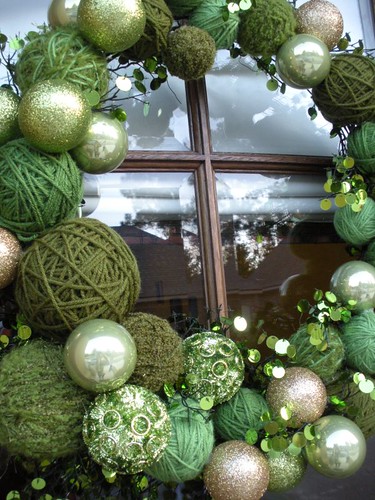
Yarn in miscellaneous colors and textures
We used:
Moss green
Pea green
Spring green
2-ply fuzzy
*we also separated the 2 ply and used each by itself then used the fuzzy ply with the spring green. This brings in different colors and textures throughout the wreath
Directions:
1. Cover your table with paper
2. Place the wire wreath form on the table with the curved edge toward you
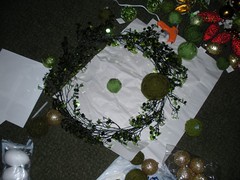
3. Position the decorative garland into the wreath and wire around using floral wire
4. Spread the decorative branches so they will show after the ornaments are attached
5. Using Styrofoam ball of your choice and yarn of your choice, place some glue on the Styrofoam ball attach yarn and begin to wrap the yarn around the Styrofoam making a yarn ball. Be sure to cover the entire area so nothing shows through the yarn. Secure the end of the yarn with a pin and glue the end down (this end will not show). Allow glue to dry
6. Continue wrapping Styrofoam balls with different yarns
7. Cut 8" lengths of floral wire (these will be used to secure the yarn balls to the wire wreath)
8. Push a wire length underneath 7 or 8 yarn threads on the glued and pinned side of each yarn ball. Twist the wire ends a couple of times to secure
9. Position the yarn balls in a varied pattern around the wreath (it might help to take a digital photo once you get them into a position that you like)
10. Begin wiring the yarn balls around the wire wreath saving some of the small and extra small ones aside

11. Cut appropriate lengths of wire for ornaments
12. Loop wire through ornament hook and secure them to the wire wreath in a varied pattern around the yarn balls
13. Use glue gun sparingly if necessary to hold ornaments in place. Glue will show on yarn so make sure it is tucked behind the ornaments when you use it
14. Arrange remaining small and extra small yarn balls to fill in gaps or on top for dimension
15. If desired, cut twigs from the decorative garland and reposition to fill in any gaps
16. Use floral wire to form a strong loop on the back top of your wreath. This will be used to hang your wreath on a nail or wreath hanger
We took turns holding the wreath up and standing back to determine where fill-in ornaments were necessary. If your wreath will be in the weather, you may consider spraying it with a protective layer sold at craft stores.
Don't forget to send a link to your wreath, Ang and I would love to see it!
.JPG)


3 comments:
Thank you so much for sharing all the wreath info. It looks like a fun project.
That is SO totally awesome! Thanks for taking the time to do that! :)
Thank you for the directions - absolutely beautiful!
Post a Comment